Touch Typing Guide: Master Keyboard Finger Placement
Are you still looking at your keyboard while you type, fumbling for keys and making frequent corrections? If so, you're missing out on a significant boost to your productivity and comfort. Gone are the days when efficient keyboarding was just for secretaries. Today, whether you're a student, a professional, or simply a casual user, mastering your keyboard is a fundamental skill. Learning touch typing can revolutionize your efficiency, reduce errors, and transform your interaction with the keyboard. How to improve typing speed? Discover why ditching the "hunt and peck" method is the essential first step to truly mastering your keyboard. Ready to begin your journey? You can always test your typing skills and measure your progress.

Why Learn Touch Typing? Benefits & Basics
Before diving into the mechanics, let's understand why mastering this skill is so crucial. Learn keyboarding the right way from the start, and you'll unlock numerous advantages that extend far beyond simply typing faster. This foundational understanding will motivate your practice and highlight the long-term gains.
What is Touch Typing and Why Does it Matter?
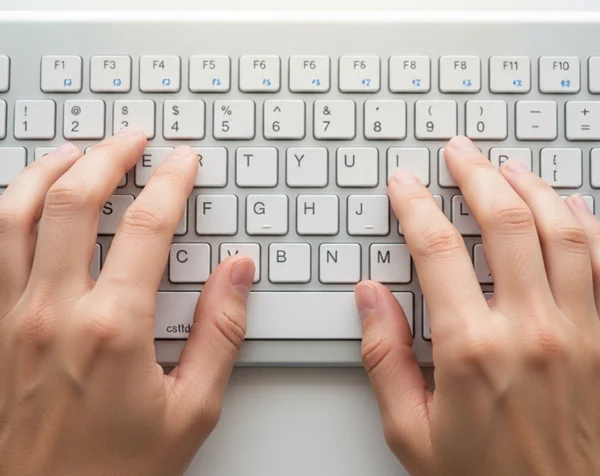
Touch typing is a method of typing without looking at the keyboard. Instead, your fingers learn to instinctively find their designated keys through muscle memory. Each finger is assigned specific keys, ensuring an efficient and fluid movement across the keyboard. This technique eliminates the need to constantly shift your gaze between the screen and the keys, allowing you to focus entirely on your content. It matters because it's the gateway to true keyboard mastery, fostering efficiency and reducing cognitive load.
Key Benefits: Speed, Accuracy, and Ergonomics
So, why bother with touch typing? The advantages are clear. First and foremost, you'll experience a dramatic increase in typing speed. Without the constant visual distraction, your fingers move more fluidly, translating thoughts into text at an astonishing rate. Secondly, your accuracy will soar. As muscle memory takes over, typing errors decrease significantly, saving you valuable time on corrections. Finally, touch typing promotes better ergonomics. Maintaining a proper posture and hand position helps prevent strain injuries like carpal tunnel syndrome, ensuring comfortable and sustainable typing sessions. This skill is truly an investment in your long-term health and productivity. When you’re ready, try a free wpm test to see these benefits in action.
Essential Keyboard Finger Placement for QWERTY
The heart of touch typing lies in understanding proper finger placement on the keyboard. This section will guide you through the standard QWERTY layout, ensuring each finger finds its rightful home, from the foundational home row to the far reaches of the keyboard. Consistent finger positioning is the cornerstone of building speed and accuracy.
The Home Row Advantage: A, S, D, F and J, K, L, ;
The home row is your starting point—the foundation for all QWERTY typing guide principles. For your left hand, position your index finger on 'F', middle on 'D', ring on 'S', and pinky on 'A'. Your thumb rests on the spacebar. For your right hand, place your index finger on 'J', middle on 'K', ring on 'L', and pinky on ';'. Your right thumb also rests on the spacebar. Most keyboards have small bumps on 'F' and 'J' to help you find these keys without looking. Always return your fingers to the home row after striking any key. This constant return creates the muscle memory essential for fluent typing.
Beyond the Home Row: Mastering Upper & Lower Keys
Once you've mastered the home row, it's time to extend your reach. Each finger is responsible for a specific set of keys beyond the home row.
- Left Index Finger (F-key finger): R, T, G, V, B
- Left Middle Finger (D-key finger): E, C
- Left Ring Finger (S-key finger): W, X
- Left Pinky Finger (A-key finger): Q, Z, 1, Tab, Caps Lock, Shift, Ctrl, Alt
- Right Index Finger (J-key finger): U, Y, H, N, M
- Right Middle Finger (K-key finger): I, Comma (,), Period (.)
- Right Ring Finger (L-key finger): O, L-bracket ([), K-bracket (])
- Right Pinky Finger (;-key finger): P, Apostrophe ('), Forward Slash (/), Shift, Enter, Backspace, numbers 0, -, =
Remember to use the appropriate Shift key for capitalization (left Shift for right-hand letters, right Shift for left-hand letters). Practice these reaches with a light touch, ensuring your fingers always return to the home row after striking a key. This disciplined approach builds correct finger placement exercises and speeds up your learning process.

Practice Drills: From Beginner to Fluent Typist
Learning touch typing isn't just about knowing where your fingers go; it's about building muscle memory through consistent practice. Think of it like learning an instrument or a sport—repetition is key. These practice drills will guide you from simple exercises to more complex typing challenges, helping you achieve impressive speed and accuracy. You can always measure your progress with our online tool.
Getting Started: Simple Home Row Exercises
Begin your journey by focusing solely on the home row. Start with simple drills that involve typing combinations of A, S, D, F, J, K, L, and ;. For example, type "asdf jkl; asdf jkl;". Focus on accuracy over speed at this stage. Your fingers should feel the keys without your eyes guiding them. Once comfortable, introduce words composed entirely of home row letters, such as "lad," "fall," "ask," "salad." Repeat these exercises until your fingers move instinctively. This builds the foundational keyboarding test skills.
Building Speed and Accuracy: Word and Sentence Drills
After mastering the home row, gradually expand your practice to include upper and lower row keys. Begin with short, common words that utilize these new keys (e.g., "the," "quick," "brown," "fox"). As your confidence grows, progress to full sentences. Pay close attention to your accuracy; a high WPM (words per minute) means little if it's riddled with errors. Use typing exercises that highlight common letter combinations. Our online typing test platform offers various typing speed test options, including customizable text, allowing you to practice with content relevant to your needs. This can be a great way to refine your skills and prepare for a full typing test session.
Consistency is Key: Integrating Practice into Your Routine
The secret to becoming a fluent typist is consistency. Aim for regular, short practice sessions rather than infrequent, long ones. Even 15-20 minutes daily can yield significant results over time. Integrate practice into your routine: perhaps before starting work, during a break, or as a warm-up. Track your progress regularly using a reliable WPM test online. Seeing your typing WPM test scores improve will keep you motivated. Remember, building muscle memory takes time and patience, but the rewards in efficiency and comfort are well worth the effort.

Your Journey to Typing Mastery Starts Now
You've now discovered the essentials for mastering touch typing. By consistently practicing proper finger placement and focusing on both speed and accuracy, you're ready to transform your typing habits, boost your productivity, and enjoy a much more comfortable keyboard experience.
The next step is to put your new skills to the test. Head over to WPMTest.cc to take a free WPM test and measure your progress. Our intuitive platform offers immediate feedback and supports customizable practice, making it the perfect companion for your typing improvement journey. Start your words per minute test today and see how quickly you can become a touch typing master!
Frequently Asked Questions About Touch Typing
Here are some common questions about touch typing and how to improve your skills.
What is a good WPM score to aim for when touch typing?
For beginners, a good starting goal might be 30-40 WPM with high accuracy. As you improve with touch typing, aiming for 60-80 WPM is considered excellent for most professional tasks. Some typists can even exceed 100 WPM! Remember, consistency and accuracy are more important than raw speed, especially at the beginning. You can check your current typing speed test at any time.
How can I improve my typing speed after learning touch typing?
To further improve your typing speed after learning touch typing, focus on accuracy first, then gradually push for speed. Practice typing full sentences and paragraphs. Incorporate varied texts, including those with numbers and special characters. Consider practicing with a typing test 1 minute, 3-minute, or 5-minute duration to build stamina. Regularly using an online typing test can provide consistent feedback and help you identify areas for improvement.
How long does it take to learn touch typing effectively?
The time it takes to learn touch typing effectively varies greatly depending on individual practice habits. With consistent daily practice (15-30 minutes), most people can develop basic touch typing skills within 2-4 weeks. Achieving true fluency and high speed can take several months of dedicated practice. Patience and persistence are key!
Can I test my new touch typing skills online?
Absolutely! The best way to test and track your new touch typing skills is by using a reliable online platform. Our online WPM test offers a free, simple, and accurate way to measure your typing speed and accuracy. Just visit our homepage and start your typing test today. It’s perfect for both beginners and experienced typists looking to measure their improvement.